How to Hang Canvas Wall Art
So you’ve already gone through the painstakingly arduous process of picking artwork out for your walls. Whether it was one prominent piece or a series of prints, the hardest part of the process is done, right? Well, if you’re like us, when it comes to hanging artwork, the task seems daunting, annoying, and ridden with the possibility of messing things up. So we want to help.
Below you will find a step-by-step guide on how to hang your work of art in your home, office, or wherever you’ve decided it should live. Good luck, take your time, and just remember to breathe.![]()
Step 1: Placement is everything
The first step in this process may seem silly but it needs to be stated. Find the perfect spot for your new artwork. Nothing is more frustrating and annoying to do all the work it takes to hang your new piece of art to then find out that you don’t like it there after all. Take the time in the beginning as it will ultimately save you time in the end. We know this can be a step that ultimately keeps you in limbo but a great way to help narrow things down is to start off with picking which room your new piece or pieces will go in. Once that’s done, congratulations, you’re ready for step two.
Step 2: Find your center
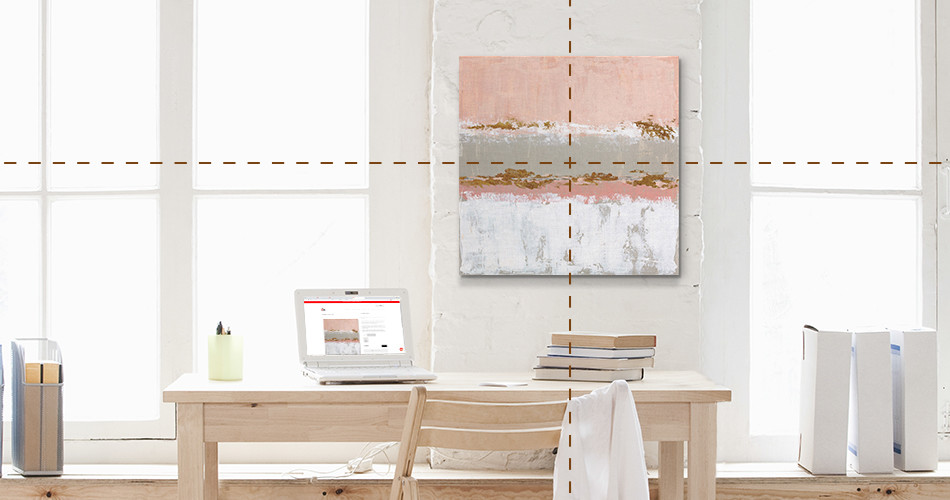
Next, you’ll want to hold your artwork up to your wall and mark the wall along the top center of the piece with a pencil. If you want to be even-Steven about it, measure the horizontal distance of your piece to find the exact middle and then mark the top center using that measurement. Now don’t go crazy and start marking up your walls, you just need a simple line for a reference point when you come back to hanging your piece.
Step 3: Choose your hanging method
From here, you have a few options as far as hanging goes.
- 1-2 wide-headed nails – With this method, simply lay your artwork down with the back facing up. Measure the height of the wooden frame as this value will represent the distance from which you place your nail(s) from the line that you drew in the previous step. Next, using the height measurement from the previous step, measure down from the center point and mark an X. Then, simply hammer the nail in and place your artwork on top. If you’d like a more secure mounting, place your artwork up on the wall again, finding the center, and mark the left and right corners with your pencil. Next, repeat the aforementioned steps, slightly inset from the left and right corners, to create a more balanced, centered and straight work of art.
- Picture hanging wire – With this technique, follow the instructions that come with your hanging wire set. Once installed, hook a tape measure onto the hanging wire and pull so that the wire is taut. Next, measure the distance from the top of the artwork to the hanging wire. Using this measurement, measure down from the center point and mark an X. Then, simply hammer the nail or use a drill if you’re using a screw and place your artwork on top. Voila, it’s done!
- J-hooks – These are definitely a more economic as well as less permanent option in that they allow you to hang your new artwork up without having to put holes into your wall. Some J-hooks only come with an adhesive option while others have an option for using nails or peel-off adhesive. The process for J-hooks is similar to those mentioned above. Simple measure the height of the J-hook and use that value when measuring down from the top of your piece to adhere your hook onto the wall.
See… that wasn’t so bad now, was it?
We hope you found this mini tutorial helpful in getting your beautiful new works of art from off the floor and onto your walls. If you still need a helping hand, check out this WikiHow tutorial for a step-by-step guide. Happy hanging!
 Contemporary
 Fashion
 Sports
 Father's Day
 Halloween
 Mother's Day
 Spring
 Summer
 Thanksgiving
 Farm Animals
 Architecture
 Barns & Farms
 Places
 Minimalist
 Modern
 Figurative
 Grand Millennial
 Reimagined Masterpieces
 Typography
 Impressionism
 Black
Black
 Blue
Blue
 Green
Green
 Orange
 Pink
Pink
 Teal
Teal
 Yellow
 Bronze
 Burgundy
 Copper
 Neutrals
 Black & White
 Colorful
 Tan & Beige
 Very Peri
 Georges Seurat
 Oliver Jeffries
 Synthia Saint James
 Tom Quartermaine
 Dean Russo
 Farida Zaman
 Jane Slivka
 Mark Chandon
 Nan
Nan
 Sylvie Demers
 Georgia O'Keeffe
 Gustav Klimt
 Leonardo da Vinci
 Pierre-Auguste Renoir
 Vincent Van Gogh


Leave a comment
This site is protected by hCaptcha and the hCaptcha Privacy Policy and Terms of Service apply.